
Here is the link to our "space" - Link


The room is not remodeled yet, and we are projecting on the wall, but it still makes a great theater at 20' wide and 38' deep. We have remodel plan for this room, but it comes after a number of other items.
I needed to mount the projector behind the beam, so I used a flat-screen TV mount, which can hold up to 80 pounds. This cost about $80. To buy the mount, plus the wall mount adaptor put a projector mount at over $120.

...Go Beavs!


We worked to keep the same overall footprint for the structual walls, this helped keep the cost down. We removed a wall that was mostly pocket door, moved the guest bath wall over slightly, and added doorways.

The former master bath was only 7" x 8", and both baths were extremely dated.

Now the master is 8" x 14" and closet is 6" x 14".
What really made the difference:

 The stove is in the corner of our basement and pretty much heats the entire house, other than the initial warm-up by the heat pump in the mornings.


I designed this armoire myself. I wanted one that had full-length doors, giving it an older look. This one has a maple interior, with fixed shelves. It is purely for storage - no TV.

Click on the title link for the full set of photos
 These were glued and screwed together, then attached to the ceiling as shown here. The 1x3 flanges allowed for easy nailing to get them up there. I added 2 1/2 screws on both the flange and the outsides. In addition, I used construction adhesive to help minimize movement later on.
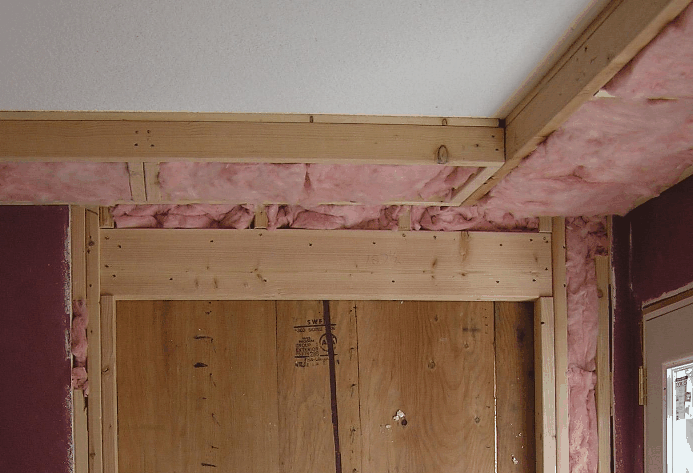 I added insulation to these. The top plate of a room's framing is one of the largest surface areas with no insulation, allowing for "thermal bridging". The heat travels through the wood much easier than insulation. Putting insulation here stops the bridging, plus adds additional ceiling R-value. I took the vapor barrier off, and drilled holes in the ceiling sheetrock to stop condensation from building up.
Here is the sheetrock:
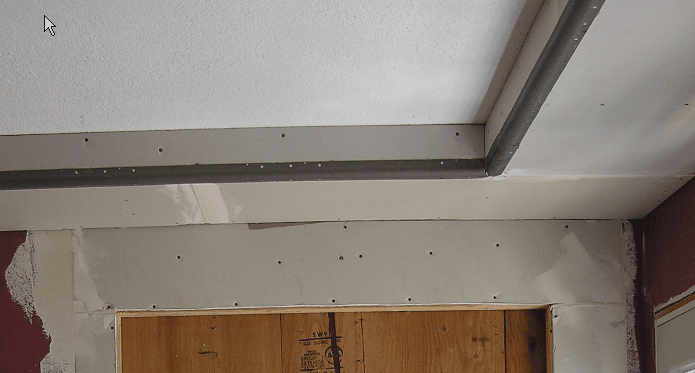
Here is the final product:

We like in the added design interest this creates, plus it helps to visually "lift" the center part of the ceiling.
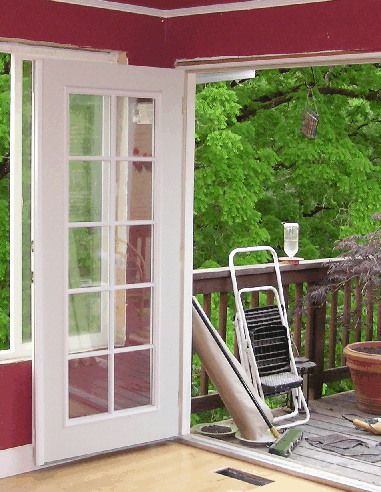 So far the exterior doors we have put in the house have ended up being between 3/4 and 1 1/2 inches shorter than the interior doors and windows. The old ones we took out had the same problem as well.
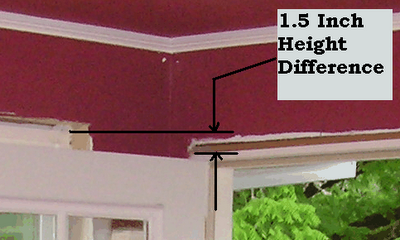
I could fiddle with the trim reveal to get an additional 1/4 closer, but they would still be 1 1/4 off. If the top trim pieces to came together at different hieghts in the corner, it would look like an amatuer job. After thinking about it for a day, here is what I came up with.
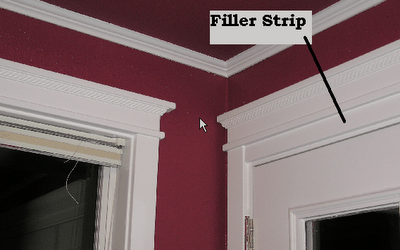
Visually, this gives a nice clean top line. Also, the filler strip is mirrored by the bracket for the blinds in the window. This balance makes it look natural.
Design concept: Keep the horizontal lines at the same level (clean). Fill in as needed, making the fillers simple and inset.
Detail on eHow:
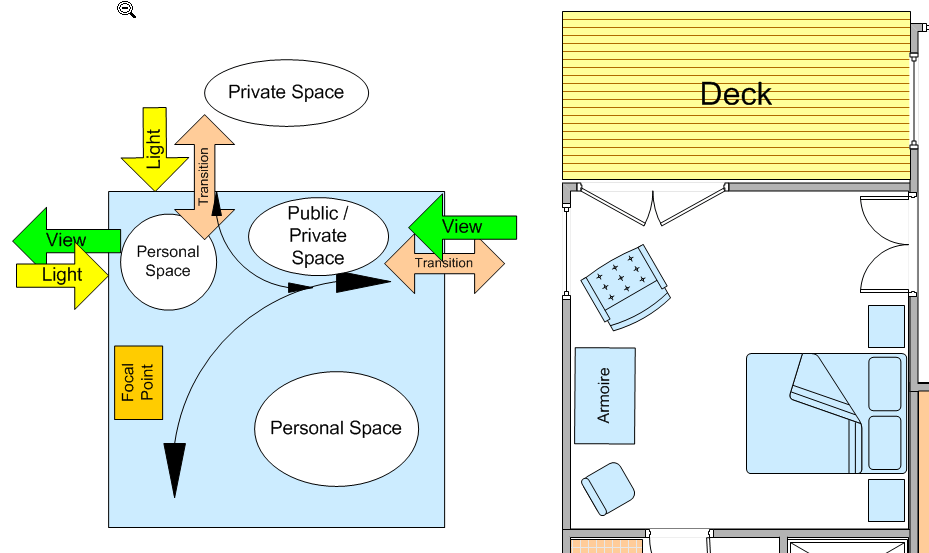
Light and Views:
Here are the before and after pictures
Master Before Moving In

After Installing New Window, French Doors, Soffits for Tray Ceiling

Patterns
Perception
Layout - How you put all of the above together...
This is a rough concept drawing for setting up an area:

All of this allows me to think critically about the remodeling choices we make.
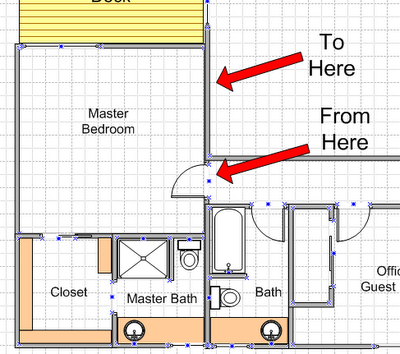
By moving the door from the end of the hallway to the living room, it allowed us to use all the hallway area for functional space. Once we moved the bedroom entry, the rest of the changes we wanted to do fell into place.
It took us a little time to decide that we would like, or at least not mind, our bedroom door right off the living room. Now that it has been in place for about a year, we are really glad we made this decision. We checked online, and found a number of newer house plans with the master directly off the main area. Also, the way the bedroom is configured, you don't see the bed. Finally, it allows some really nice views which I will discuss later.
 This was the reaction (maybe a little exaggeration) of our realtor when she saw the long dark hallway that lead to the master bedroom. She thought it was one of the main reasons that the house had sat on the market for almost a year.
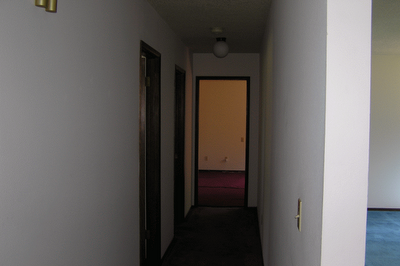
Upstairs we had 3 "zones" of remodeling: the bedrooms, the kitchen, and the central fireplace. The house configuration was such that each could be done independently, with little impact to time or cost. The focus of the following posts will be the bedrooms.
Here is the original bedroom zone plan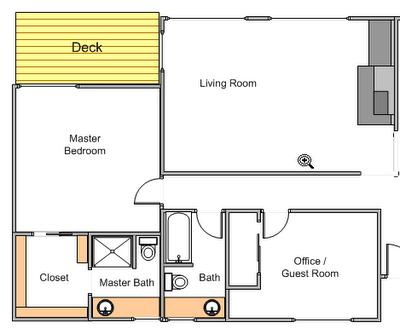
Here is the remodeled plan

In this remodel we did not care about resale, although we think the value has gone up a lot. We focused on applying design concepts that create a great home.
Some of the not-so good things:
So we took the place as a "starting point", and we have started to renovate it into the house we really want. We are not dedicated to restoring it to any period, but to a comfortable style.
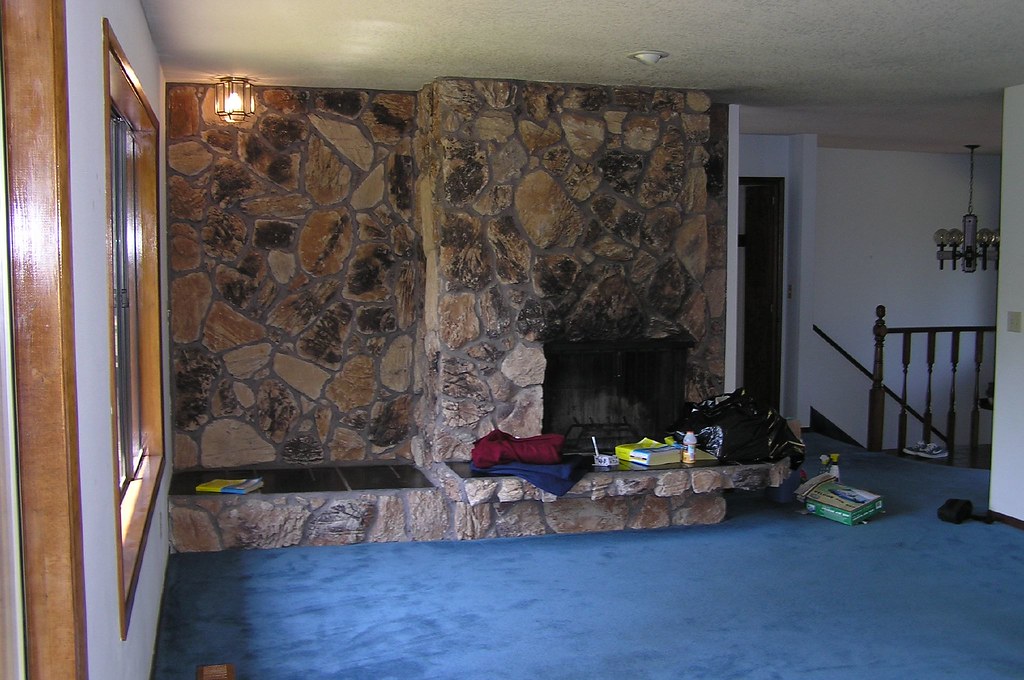
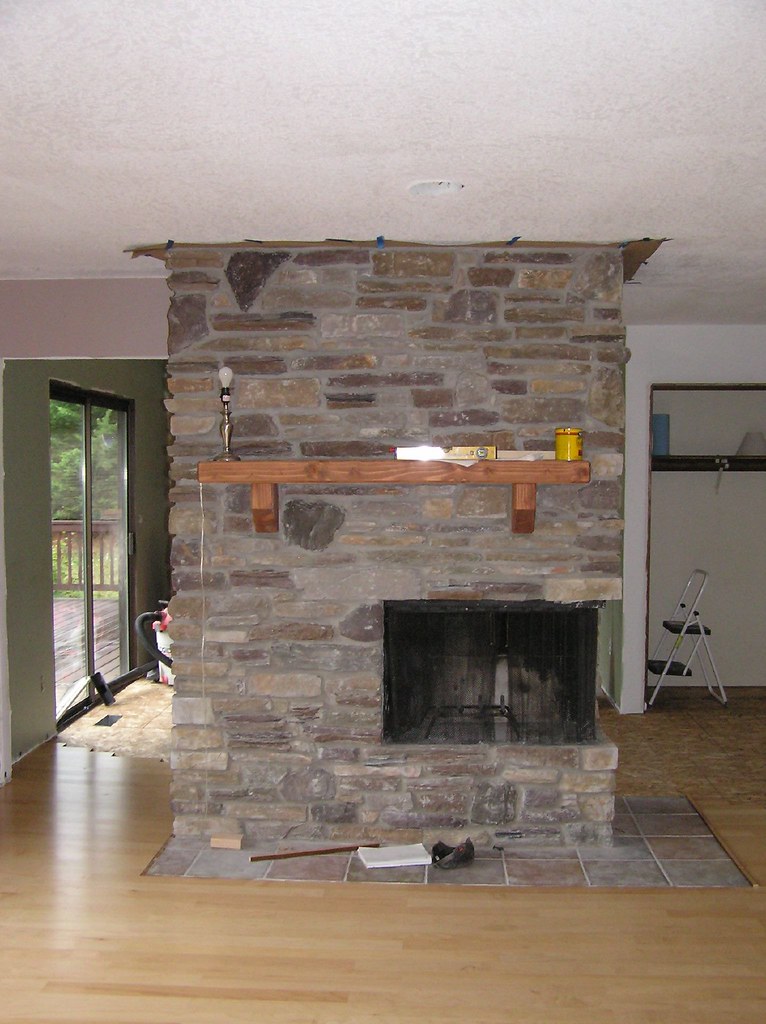 What changed?

Please consider sponsoring a child.
All revenue earned by this blog through advertising is donated to causes to help those in poverty. My aim is to help them gain a better life now and put their hope in God for their future.


