Greengate Ranch Remodel
Remodeling a Daylight Ranch in Oregon

Sunday, August 30, 2009

Finishing up My Son's Walk-in Closet

My son and I installed the closet organizer we built last week. The diagram below shows the layout...


As I stated in an earlier post, this is about as small as you can get for any sort of workable walk-in closet. That being said, there is actually a lot of room in there with the cabinetry installed.

We did a slightly larger one of these for my daughter (8' x 4'), and I am sold on this design. It seems so much more functional than the standard two feet deep closets. It also takes up significantly less wall space within the room. If I every design another house, there will be walk-ins, at least small ones, in every bedroom.

Here are the shelves on the left side, with the hanger bar below. We put the bar out 16" from the wall, instead of the normal 12". This allows for my son to store stuff along that back wall.


The right side now holds the dresser, and all the slides have been adjusted as needed. The next step is to affix the drawer fronts and hardware.


A tip for building your own drawers using drawer slides...

You want the drawers to slide in and out without any binding or slipping. Binding comes from the drawer being too tight or not aligned correctly, and slipping comes from the drawer bring too loose.

I make the drawer 1/16" to 1/8" narrower than the opening, minus the requirements for the slides. In this case, the openings are 34", and the slides take 1" - so the drawers are 32 7/8" wide. This extra little bit allows me to shim the rails to get them aligned and the correct width. I use washers between the rails and the cabinets for shims.

Saturday, August 29, 2009

Building a Window Seat #2

In the following set of pictures, I show how I installed the window seat cabinet I built earlier...

Here is the bump-out we added for the window seat. It has a concrete floor and foundation (same as the rest of the basement) and standard framed walls.


The cabinet will be hung by the walls in the back and on the sides, and sit on the floor in the front. Here I attached 3/4" plywood pieces to the bottom to bring the cabinet up to the correct height.

Also note that I ran 3/4" boards across the bottom in the center. This was probably not needed - there won't be anything too heavy stored in this. Adding the scrap pieces took no time or cost, and it ensures there will never be sag in the bottom.


Because the wood supports will sit on the concrete, I added a layer of asphalt shingle (poly glued and stapled) to block any moisture that would migrate up into the wood over time. These get poly glued to the concrete once in place.


I build the cabinet approximately 1/2" less deep and 3/4" narrower than the opening. Just like a door, you need the rough-in dimensions to allow for some room to adjust everything. Here I added 1/2" plywood pads across the back and 3/8" ones on the right side. After marking the level-line around the walls, I quickly stapled these in place, and then firmly attached them with 2" screws into the studs.


I set the cabinet in place, pushing it against the back and right side. Once it was level and tight, I quickly shot in 3 finish nails to hold it in place. After that I drilled and secured it with 3" screws into the surrounding studs. Finally, I slid a shim in the left side and put screws in.


Here is the final photo of the cabinet in place. Note that I did not put any insulation between the bottom of the cabinet and the concrete floor. My main reason is to not allow any moisture to get trapped in there and cause problems later. I figure with the cabinet (most likely filled with blankets) and a 4" cushion on top, there will be plenty of insulation.

The next steps are to trim the cabinet to the wall and fit the lid in place. Before I do that, my DW will paint the walls, so she doesn't need to cut it in later.

Saturday, August 22, 2009

Building a Window Seat #1

While I have been working on my son's room, I also got the widow seat area ready to go. I am working on building the seat cabinet as well...


Here is an in-progress picture of the seat cabinet. The main structure is made from pre-finished plywood. I put pine battens on the ends to create something I could screw the panels to. I also put scrap peices of 3/4" plywood across the bottom panel to reinforce it (this is good reason to keep those 2 foot cut-off scraps). Finally, you can see where I am adding the front pieces (rails, stiles, beadboard) using brads and poly glue.


Here is a quick picture of the 1/2" pre-finished plywood. I bought these 4x8 sheets for $25 each at Shurway building supply.

Small Walk-in Closet for my Son's Room

We completed the sheetrock, texturing and painting in my son's room today. As part of the remodel work we are doing, we converted part of a former hallway into a walk-in closet for the room. The old closet is going to become an alcove for the adjacent bathroom. Sometimes I think I like to play musical chairs with the floor plan...


The hall was just over 3 feet wide (37 inches), and I placed the wall so the closet width would be 7'6". This is about the smallest walk-in closet possibe. He should have ample space in at the door to walk-in an turn around. One side has a dresser and shelves, while the other side has closet rods and shelves. You could get the same functional space with a 6" wide 2" deep closet, but the wide opening would take up a lot more wall space. Also, the back wall of the walk-in will have hooks to hang things.

My son desgined the closet organizer, and we both worked on building it. Here are a couple of pictures...


He decided on a black ebony stain, which my daughter also did in her room. It looks good on the pine face frames.


I am hoping to get these installed tomorrow so we can start carpeting.

Wednesday, August 12, 2009

Installing Carpet Tiles #3 - Done

My DW finished installing all the carpet tiles in the main areas of our basement - about 1400 sq. ft. in all. In summary, we are really happy with the quality of the product and the results.

The additional tiles arrived for the kids rooms. As with the other order, we received what we ordered on time and delivered into our garage for about 1.90 a square foot. These tiles are also the Mowhawk Ecoflex - but they were only available in small lots, so the price was a bit lower.

After walking on this carpet for a couple of weeks, we have decided it's noticeably more comfortable than the "cheap" carpet we had before with a low-budget pad. The lightweight pad was thicker, but compressed down to almost nothing with stepped on.

Carpet Padding Info

Thursday, August 06, 2009

A Good Resource for Understanding Stimulus Money for Remodeling

I found a very comprehensive site for understanding how I can take advantage of the stimulus / tax rebate offers in 2009: Remodeling Magazine - June 2009. The best information on the site is summed up in: The Stimulus at a Glance Chart.

Here is an example for windows, doors, etc.


So, what does this mean for me:

  • I am planning my budget to get the maximum $1500 rebate for various windows and an exterior french door for our dinning room. To get this, I need to spend $5000 - and after the 30% rebate it will net out to $3500.

  • I am planning on buying a pellet stove for my shop I am going to build. I need to purchase it in 2010, so I can take advantage of the rebate next year. The current plan only provides for this through then (who knows, it may change).

  • I want to add solar electric to the house. The programs for that extend out for quite a while, and I think could possibly get better.


  • Finally, here is where the stimulus money - and possible rebates to those of use who remodel - are going over the next few years. Click on the graph to go the site.

    Saturday, August 01, 2009

    Sherwood, Oregon Named a Top-10 City in America for Families

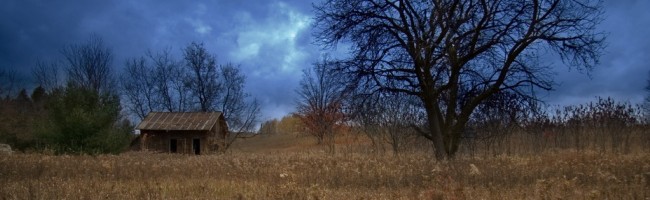
    I am an unwavering fan of Oregon. I know that I am biased, having always lived here, but we really do have just about everything: forest, ocean, mountains, desert, rivers, cities and small towns. I travel a lot of places, and I haven't found anywhere I would rather live.

    Our town, Sherwood, is one of the great places in Oregon. It was just named one of the best cities in America to raise a family. Here is a link to the article. We are close to Portland, and all it offers, but we adjacent to the country and still have a small town atmosphere.

    Here are a few pictures from around town...


    Every place has its pros and cons, and I think we have more than our share of the pros here. I am thankful to be able to invest ourselves in a place like Sherwood.
    See my article library on eHow...