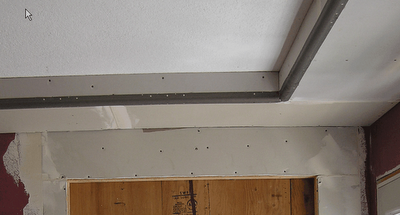
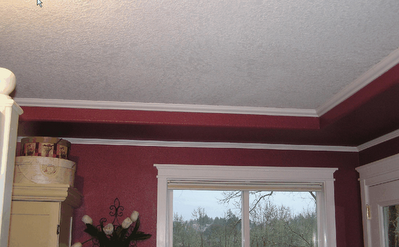
In our last home, and in many of the "inspiration" houses we have looked at, the master bedroom has an elevated tray ceiling (also called a box ceiling) - so we decided to add one. My first thoughts were on how we could raise the ceiling and get a 9 foot center. That would have meant re-engineering the roof trusses, tearing everything out, and doing some signficant refraiming. We like the look, but it was not worth that level of effort.
In a number of the new homes they are building in the area, they are sticking with an 8 foot ceiling upstairs, and creating the tray with 2x6 soffits. I decided this was a pretty simple way to get it done. Since we already had a ceiling up, I built the units out of 2x4, plus an additional 1x3 to function as a flange for attaching to the ceiling trusses.
Here is a cross-section:
 These were glued and screwed together, then attached to the ceiling as shown here. The 1x3 flanges allowed for easy nailing to get them up there. I added 2 1/2 screws on both the flange and the outsides. In addition, I used construction adhesive to help minimize movement later on.
 I added insulation to these. The top plate of a room's framing is one of the largest surface areas with no insulation, allowing for "thermal bridging". The heat travels through the wood much easier than insulation. Putting insulation here stops the bridging, plus adds additional ceiling R-value. I took the vapor barrier off, and drilled holes in the ceiling sheetrock to stop condensation from building up.
Here is the sheetrock:
We like in the added design interest this creates, plus it helps to visually "lift" the center part of the ceiling.


1 comment:
Absolutely beautiful!
Post a Comment