Greengate Ranch Remodel
Remodeling a Daylight Ranch in Oregon

Sunday, August 31, 2008

My DW's "Away Place"

A reoccuring theme in many of the design books / blogs I read: Create "away spaces" that allow for personal quite time. This is also common sense, in that it's nice to have your own spot in the house to relax and think. Here is picture of what we came up with for my DW...


This is simply in the corner of our master bedroom, which is not a large space (14' x 14'). Sorry - picture quality isn't the best here.

It incorporates the folowing design elements:
- Natural light on two sides
- Overlooks a forest area
- Has a lowered ceiling (soffit)
- A space for devotional books
- Is private location

We are planning on creating at least one, maybe two more of these types of spaces in the house as we complete the remodel.

Saturday, August 30, 2008

Ultra-modern in Amsterdam

I'm traveling again, diverted away from working on the house. I spent the evening in Amsterdam, staying in the new ultra-modern
CitizenM Capsule Hotel. Someone set off an IKEA bomb and this picture shows the result...


Kidding aside, there are a lot of nice design elements to the room. You have a comfortable room in just about as small of footprint as you could manage, yet it doesn't feel cramped. Also, the cost is 30% to 40% less than just about anything else around the area. I will definately use this for overnight stops in the future.

I am not personally a fan of cutting-edge design, our own home being much more cottage / french country in style, but I do appreciate what the Dutch come up with. They are not afraid to experiment and do some serious forward thinking. Also, in some senses, modernism is just an overlay on top of the basic design that can be applied in various cases, including work with more rustic elements. If you only expose yourself to Pottery Barn, then that's all you are ever going get...

A very interesting blog that mixes modern design and rustic materials is Pacific Northwest Regional Architecture. This shows true mixes of traditional materials and new design.


Finally, if you track any of the newer design blogs (Inhabitat for example) you can see a lot of the featured items in the lobby of the hotel. If you are going through Amsterdam's airport (Schiphol) and you have an extra hour to kill, take a quick walk down to the hotel and check it out.

Sunday, August 24, 2008

Garden Shed #18 - Roof Complete

I completed the roof of the shed in the rain. Last few days of August in Portland, and it's raining pretty hard. The up side is that we just may have another great snow year on Mount Hood.


The Cobra Vent was easy to to install on the ridge. The ridge shingles (I cut them out of leftover pieces rather than buy special ones - keeping green in mind) went on easily. There is now a lot of air space under the ridge to help keep the shed cool in the summer and dry in the rest of the year.

The plum tree in the picture is just about ready to be picked. Things are a bit late this year, likely due to the lack of sunshine. I am really glad I was able to keep it and meet the set-back requirements. It should have just enough room to stay healthy and productive - besides, it will look nice close to the shed.

A note on set-backs: As I discussed in an early post of this project, the shed is just under 200 square feet and therefore does not require a permit. This does not change the need to follow set-back guidelines. I went ahead and sent a sketch (used Google earth) of the shed location to the city, so we could at least have a discussion about it before I started. They noted that 20 feet set-back to the road is needed for them, then they noted an existing 25' utility easement as well. I am glad I asked, and put the corner right at 25'. My point here is to take the time to talk with the city or county before starting something like this regardless of permits needed. I would hate to put all the effort in and then have a problem.

The next task is to paint thing, but we need the rain to stop for at least a few hours to get new paint samples on.

I finished the design of the push-out windows. These will be hingled at the top and simply push out to open and let air in. A small rod will hold them open, and latches will secure them. I have seen these more in the UK & EU than in the US.


I went to the dollar store and found 8.5 x 11 picture frames with glass. I bought 30 of them for $30. These will be the the window panes and fill the top of the sliding door. I figure the pine for the windows will be $5, so with hardware and paint I should have nice windows for under $15 each.

Monday, August 18, 2008

DIY Resource: Blogs about Blogs

BABAB (Blogs about blogs about blogs...) can be pretty frustrating. Sometmes I think that there is just one guy who lives outside of Reykjavik that creates all the true content on the web, and the rest of the world just blogs about it, and each other. All this seems to be an attempt to sell advertising with the least amount of effort.

Kidding aside: Charles and Hudson is one of the few blogs about other DIY blogs that I like to keep up with. They cover a wide range of topics that actually have substance - as opposed to surface level summaries and lots of ads. I think it's worth putting on your RSS feed list, if you track information that way.


While I was catching up on C&H, I read a post about an Instructibles article on sound-proofing a garage. This looks like a pretty slick and inexpense way to isolate your drywall to control sound. If I were sheetrocking our theather room again, I think I would employ this technique.


Just in case you are looking to make a bokken (Japanese wooden sword), I have an Instrucibles article on it.


Another one that is fairly good is Hewn and Hammered, focusing mainly on the arts & crafts movement. I am very interested in A&C, lodge, and rustic styles

Saturday, August 16, 2008

Garden Shed #17 - Roofing

We put half the roof on this morning before the temperature reached 90 degrees. After that, we declared victory and retreated to the house to watch the Olympics. My daughter (age 16) cut shingles and fed me materials, so we did it in under two hours once we got going.


I decided to go with a ridge vent after all. I bought the Cobra Vent kit from Home Depot for $55. It's 20' in length and 8" wide. It looks like a very loose scrubbing pad material that allows a lot of air to flow from the ridge. I don't really need this in the shed - 3 or 4 roof vents would have worked fine, but I wanted to test it out. 4 roof vents cost about $40, so the cost is comparable.


I want to put this on the roof of the garage I'm going build, plus our house, so it's good to get a bit experience with it before I spend a whole lot of money. I can see how you could cut this into pieces and use it for venting in the eaves with little effort.

I bought a coil nailer a couple of years ago, when it was on super-sale at Harbor Freight for about $70. It shoots both roofing and siding nails - and it makes quick work of putting shingles down.


If you are going to do any significant amount of roofing or siding, I really encourage you to get one of these. You can rent one, or for about 3 days rental buy one at HF. If I were going to roof everyday (no thanks), I would go with Senco or some other industrial brand, but for the DIY person, it's hard to beat.

Friday, August 15, 2008

Garden Shed #16 - Disappointed in Sample Colors

We bought some samples from Sherwin-Williams paints, put them on the shed - and they look terible. We wanted earth tones and we got kids building blocks. The picture doesn't show it too well, but the applied colors are really bold and bright.


The paint chips (S-W has all their paint chips on line as well as in the store) looked much more muted to us when we picked them out.


There were two good parts to this:
- The samples are about $6 a quart - very reasonable.
- We changed our color scheme. If it would have been close, we would have likely just gone with something that was OK, instead of "perfect".

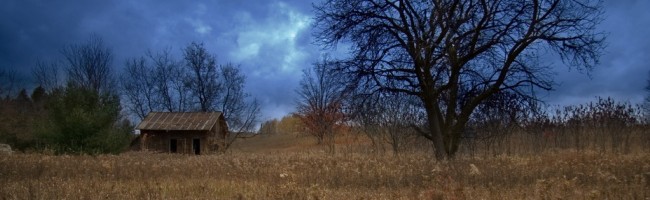
We drove around looking a colors for a while, and decided on something like this:


This house happens to be the Cooking Light 2008 Fit House, which is just over the hill from us.

I know it's just a shed, but we will use this as the scaled-down model for the colors we are going to paint our house next year. Even if we have to paint the thing twice to get exactly what we want, it's an extra $100 to get it all worked out, as opposed to about $1000 for the house paint and materials.


Starting the roof...

As you can see in the picture above, I started to roof the shed. I decided to go with architectural series asphalt shingles from GAF. These only cost about 20% more that simple 3-tab singles, and they look much nicer.

I am pretty positive that singles by GAF, Owens Corning, etc. are about the same (they would all likely disagree) - but I am very impressed with the GAF support web site. They have an entire series of videos that that detail all the important phases of doing a roof.


If you are a DIY person with good general skills, you should be able to put a roof on after watching the videos and reading the installation instructions.

I am not finishing up the roof tonight because it was over 100 degrees out there today. Tomorrow morning looks a lot better...

Saturday, August 09, 2008

Garden Shed #15 - Siding Complete

I finished getting all the battens and trim details complete, and about half the shed caulked. I hope to get it all done sometimes this weekend and prepared for paint. I also need to get the roofing on in the next few days.

We picked out colors, and now we have to decide which color goes on the top and which goes on the bottom. Sherwin-Williams sells quarts pretty cheap (less than $6) as color samples - we will put a bit on and decide what to do.


I bought a box-rail and trolley assembly to mount the sliding door - cost about $120 for a 12 ft setup. The next challenge is to figure out how to integrate it into the pergola that goes over the door.


Friday, August 08, 2008

Garden Shed #14 - More Siding

I finished off the lap siding on the lower part of the shed, and started on the battens.

Initially, I planned on using 1x2 for the battens, most likely cutting down 2x4's on my table saw. While I was in Home Depot, I saw bundles of fir lath - 60 pieces for $10.

They are 1 1/2" wide and about 3/8" thick, which gives enough of a shadow-line to look good. I mounted them with a thick bead of tite-bond wood glue and a few staples. About 20% of them had splits or bad edges, but I can cut these down for use above the doors and windows.


Once all the battens are up, I will spend a good amount of time caulking the them, plus the lap siding gaps and trim.

A tip on installing lap siding: insert small pieces of #15 roofing felt at the ends of the siding to make sure water does not penetrate at the joints. Any water that does go through the caulked joint will be directed right back out again.


In this case, my DW cut a bunch of 4" x 6" pieces, and I slid them in before nailing the ends.

Sunday, August 03, 2008

Garden Shed #13 - Trim & Siding

I finished detailing out the roof, and it's now ready for drip edge and shingles. I also completed trimming out the windows and doors, and started putting the cedar siding on. Here is a picture of the first section:


Once the cedar is on, I will cut and apply the battens to the vertical siding.


I was able to use most of the old cedar boards I pulled from the pile, cutting off less than 10% of the wood for splits and damage. Here is a picture of the remaining material. I guess I could make it look a but nicer, but why - I am going to use in the next day or so.


If I have enough cedar left over, I may cut it down to small pieces to shingles - 6" to 10" wide - and put them on the gable ends.

Here is another picture of the inside of the shed, showing the perimeter loft / shelving.

Saturday, August 02, 2008

Garden Shed #12 - Loft Storage and Roof

I installed the loft, as shown in my last post. Here is a picture of the 4' deep end - sorry it's a bit dark.


I decided to only put a 4' loft at one end and 2' at the other. In reality, 4' at both ends made the shed feel too closed in. I used doubled-up and glued 12' 2x4's with blocking in between. Both my son and I stood on it while we were putting roof on, and there was no flex.

I decided to make the sides decks 15" deep. All the studs in the shed are 7' tall, cut from standard 8' boards. We had a big pile of 12" pieces, so I used those for the blocking. The OSB is glued and nailed every 6" along these, creating wall stiffeners, as well as storage.


Here is another dark picture (on purpose) showing the vent holes in the soffit blocking. I used left over pieces of the OSB siding, drilled 5 holes in each, and stapled window screen to the backs. This cost $6 for the screen instead of about $50 for the pre-made vents.


My son and I got the OSB sheeting on the roof and nailed down. I will cut the excess off with a skill-saw tomorrow. Once done, I need to screw the OSB to the rake and fascia boards - I don't like to nail these, since they can easily come loose.


Hopefully tomorrow I will get most of the siding details done...

Garden Shed #11 - Loft Storage Plan

After putting some thought into it, I decided on the loft storage design for the shed. It might be a lot of mental energy for something as simple as a shed, but I might as well do it right. The cost and time are pretty well fixed, so it's mainly the design that makes the difference.


As shown above, the loft will span the perimeter of the walls. It will be four feet deep on the ends and about two on the sides (roof removed for clarity). I looked at a few lofts online that were 6' to 8' deep, but think that the access to the back would be poor - and it would just become a junk spot.


Also, this design helps strengthen the tops of the sidewalls. The 2x4's and OSB surface will act as a stiffener across each wall. I wasn't planning on putting extra rafter ties in, because they get in the way of hanging larger things from the ceiling. Over time, the weight of the roof can push the walls outward if not supported.


The bottom of the loft sits at the same height as the windows and doors - 6' 6" - so there is plenty of head room under it without feeling cramped.

My cost estimate to add this is $70.
- 4 sheets of 1/2" OSB - $8 each
- 2 12' 2x4 - $5 each
- 10 8' 2x4 - $2 each
- 2x4 joist hangers - $10

I want to get this put in before I put the sheeting on the roof, so I don't bump my head (as often).


See my article library on eHow...